Saturday 31 January 2015

Styling the half wig - trial

After dyeing the wig, to a darker colour, I have been able to create a simple style which I will be further developing prior to the final photoshoots. Below are some images of the style, which is too simplistic for the criteria of the project, however is effective as an 18th century male style. I believe the female cage wig may slightly overpower the simplicity of the male wig and this is something I am looking to develop in the coming days.
After setting the wig with heated rollers (which I regrettably forgot the evidence) I brushed out the soft set creating waves (see right)


I then applied backcombing to the top front of the wig to create more shape and volume true to the period.
 The hair was then tied back into a mid-low pony tail where it was important i sprayed down the loose flyaway and maintained a smooth shape (see right)


 Once majority of the flyaways were set downwards, I then re applied two rollers to the pony tails, both rolling in an anti clockwise direction to creat the curl visible in the images.


 The bow was applied to the back of the hair covering the hair tie giving a more authentic feel to the style. Something I aim to improve on within the week is my bow tying skills as well as the development of a more advanced male style.

Friday 30 January 2015

Styling the cage - Phase one - Top half of the wig.

 Once the cage was covered with the wefts secured, I used a curling tong to very accurately curl each section of the weft. I chose not to do a set as the fabric net holding the wefts onto the cage was already showing slight stretching and strain due to the weight of the wefts, and I did not want this to undergo anymore strain from the weight of rollers/wet hair and rollers.  This made it important for me to curl the hair very accurately, on a hot temperature where the heat would hold. I believe this worked as effectively as rollers may, although it did take approx the same amount of time. The style required a lot of pincurls and product setting. I chose to apply LOreal professional Thermo Protection with Lactic Acid, which helps build the proteins in the hair, and also protects from heat with setting ability. This helped keep the shape of the curls when in place. As you can see from this first set of images, only the top half of the wig is curled, with the bottom half due to be waved with beach wavers, prior to styling my models hair into it.


Friday 23 January 2015

Dressing the Cage Wig - Phase 2

 Once the top of the wig was dressed, it was important to dress the rest of the hair and get the same amount of body and width to keep the organic shape of the wig. This was difficult at first however after teasing the curls out I was able to achieve this. I then used beachwavers to create a fine wave which was brushed out, back combed and dressed up into the
 wig.
The base of the wig was very wide and hard to spread the hair around, however my models hair was dressed up into this therefore it did not concern me.
I then applied my adornments. The ribbon which has been designed into the wig cut the wig off and reduced the impression of height. however I continued to trial it with bows also in the hair.

 I then decided once the small bows were applied that the ribbon was not emphasising the style and emotion in the way I wanted, and also did not reference 18th century as much as I had thought.


I then removed this ribbon which made a massive difference bringing height back into the wig, and emphasising the beautiful fine styled curls which surrounded the hair. I am over the moon with this transformation and looking forward to applying it to my models own hair.

Thursday 22 January 2015

Posing mood board for model

After working on many shoots, I have discovered that providing a model with images of the kind of emotion and poise you would like to communicate is essential in getting the best out of a shoot. Using pinterest I was able to create a brief yet informative moodboard to aid my model in getting the right positioning and facial expressions;
https://uk.pinterest.com/charleelouisehu/posing-for-model/

Sunday 18 January 2015

Working with a stylist

Despite my efforts to work with a stylist for my FMP, the budget I had presented her with, was unknowingly not enough for her to work with to complete the project. Without any will from her to commit any of her own money towards the project, I had to make the difficult yet crucial decision that working alone to style the project would be a better decision and may help me to realise my outcome further.

Sourcing styling & costume

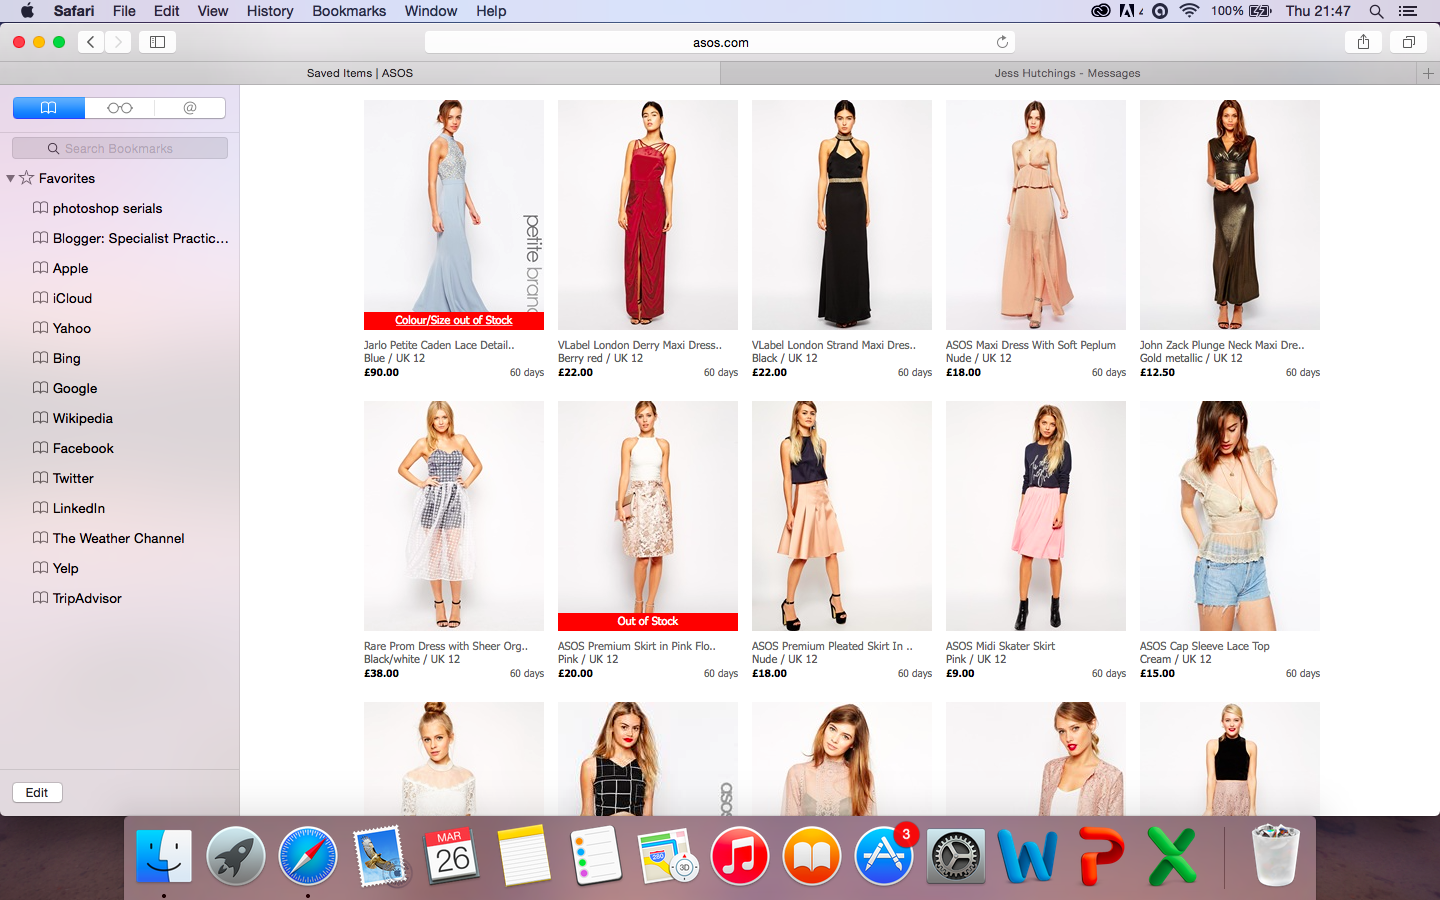
As my budget was too small for a stylist to work with, I decided to instead work to my own brief to style the project. I began looking at smaller clothing sites, particularly in sale sections, which often feature more unusual styles which have not sold as well as other lines. I was unable to find elements of the styles I was looking for so I tried ASOS, to make my search slightly wider.

 Initially I looked at all length of dress, and also two piece sets. I was working to a colour scheme of grey/silver/white for politics, black red and gold for gambling and pink and nude shades for love. You can see in the screenshot above the range of styles I looked at.

 After extensive searching, I found three dresses I believed would be appropriate for the context of my work. They are the correct colours, with interesting cuts and folds which would be appropriate for the avant garde yet historical reference. Although the dresses are quite plain in colour and pattern, adornment will be heavy with a lot of feature jewellery making this more interesting.
 Originally I wanted to purchase only one pair of unusual shoes. As my model is a size 9 this was something I found tricky to even locate, with size 9 being very sparse, particularly in heels. The pair above were unique, with clear beads hanging across the shoes, however I felt the iridescent silver shade was a little too futuristic for what I was looking to complete.


I also looked at hosiery and jewellery. Things quickly came an went out of stock as you can see here, and this sometimes became a challenge, replacing something to the style you originally wanted to receive! I will also be looking in shops for jewellery such as primark, which always has a large selection of artificial pearls and other jewellery I can use for adornement.

Saturday 17 January 2015

Styling Update

Below are images of the styling sourced for next weeks final shoots - the stylist that previously was not interested in working within the project has also now offered to partake and contribute to the budget. Below are the items sourced by myself with the final styling update yet to be complete.


Friday 16 January 2015

Setting the Half Wig

 To dress the wig, using heated roller was something I found more effective than the curling wand or wet setting. I believe wet setting would draw too much hair from the wig, and was not necessary for this style, and using heater rollers I was able to get the right size of curl whereas curling wands do not always offer that.

The set worked well to get the right shape and barrel size I wanted to achieve. The set was left overnight before being dressed out (see next post)

Dressing the Half Wig

 First using the small pieces of weft I attached to the malleable block before setting overnight in a heater roller. This gave the size and shape requires. I then using grips, shine spray and freeze spray contorted the shape, smoothing as much as possible before securing with a grip.


 The largest barrell roll which was spare, was left to pad the top of the hair where the quiff would be dressed into. This worked well, however trying to prevent splits in the wig became difficult.
The pony tail was then dressed into a loose curl, secured by ribbon alone, to give a realistic appearance.


 The barrel rolls were then attached to the head with grips to secure. Getting them even was an important part of the process which I believe in the outcome has been very successful.
To deepen the hair colour I used a light application of black hair colour, before using tigi shine mist to give a natural shiny finish, not to completely get rid of the matt texture, due to the nature of the 18th century and powdering techniques used.